
Switching to Lithium? How to Upgrade Your Caravan Battery the Right Way
Most caravan owners do not think about battery rules until they are ready to upgrade. And that is exactly the right time to think about them. Whether your AGM batteries are nearing the end of their life and you are moving to lithium, or you already run lithium and want more capacity, an upgrade is new work. New work is where the current standard, AS/NZS 3001.2:2022, applies.
That can sound daunting. It is not. Getting a lithium upgrade to comply with the new standards comes down to two decisions: which batteries to buy, and where to put them. Get those two right and your new system is compliant & insurable.
This is a practical, plain-English guide to upgrading your caravan to lithium the right way, with a full checklist you can use before you buy.
KEY TAKEAWAYS
- ⚡ The standard only applies to habitable spaces in grid-connectable vehicles: AS/NZS 3001.2:2022 covers caravans and RVs that can connect to mains or generator power through an external inlet.
- ⚡ Upgrading is the moment that matters: Switching to lithium or expanding your bank is new work, so the install should meet AS/NZS 3001.2:2022.
- ⚡ Three easy install options: Mount your new batteries outside the living space, inside a simple sealed and vented box, or use a battery with a built-in vent pipe.
Why Owners Upgrade to Lithium, and What Changes When You Do
There are really only a few reasons people upgrade their caravan batteries. AGM batteries are heavy and are only recommended to use roughly 50% depth of discharge to ensure longevity, which limits the usable capacity you get for the weight you are carrying. LiFePO4 batteries are far lighter, have significantly greater usable capacity, charge faster and more efficiently, and deliver for thousands of cycles. In real terms, a 100Ah AllSpark lithium gives you more usable capacity than a 160Ah AGM at around a quarter the weight. Owners who already run lithium often upgrade again simply to add capacity, so they can run higher current appliances for longer off-grid.
Whatever your reason, the important thing to understand is this: the day you carry out that upgrade, you are doing new electrical work. That work should be done to the current standard. The good news is that compliance doesn't have to be difficult.
What Counts as an Upgrade Under the New Rules?
AS/NZS 3001.2:2022 applies when you build, install, modify or upgrade an electrical installation. In practical terms, the following all count as work the standard applies to:
- Switching from AGM or lead-acid batteries to lithium.
- Adding more lithium batteries to expand your existing bank.
- Relocating your battery bank as part of a fit-out change.
- Adding or upsizing an inverter or charging system around the new batteries (note: any work that touches 240V AC circuits must be done by a licensed electrician - covered further down).
- Adding or upsizing fixed solar or charging systems
You do not need to tear apart a working system just to bring it up to date - the standard itself is not retrospective. However, insurers and pre-purchase inspectors increasingly take the current standard as their benchmark, so when the system is open anyway, bringing it up to spec is the sensible call as this likely gives you improvements in performance and efficiency in your upgraded componants. You are already in there with the tools out.
One important point worth knowing: AS/NZS 3001.2:2022 covers connectable recreational vehicles, meaning 4x4 vehicles, caravans, campers and motorhomes that can connect to mains or generator power through an external inlet socket. A DC-only setup with no 240V inlet sits outside the specific scope of the standard and therefore none of it applies, though much of this is good practise regardless of it being required by an Australian Standard.
Clearing Up the Common Worries
There is a lot of second-hand information circulating about lithium and the new rules. Here are the concerns we hear most from owners planning an upgrade, answered directly.
"Lithium batteries can't go inside anymore"
This is not true, and it is the most common myth. Lithium batteries can still be installed inside a caravan, including under a bed, seat or cupboard. They simply need to be in a sealed compartment that is vented to the outside. You are not forced to move your bank outside if you would rather keep it in. AllSpark Chassis mount batteries or our some of our new slimline options with vent pipes are batteries built into boxes with vent pipes ready for internal installation in a habitable space without the need to build another sealed box. Simply remove the cap on the vent pipe, connect to a pipe to the outside atmosphere with a one way valve (to stock bugs/mud/water getting back inside) and you are good to go.
"Will my insurance cover the upgrade?"
Insurers are asking more pointed questions about lithium installations, and a fault or fire is exactly when those questions can get asked. Two things can help protect you: an install that meets the location and venting rules, and proof your battery is certified to AS IEC 62619. AllSpark batteries have been tested and certified to meet and exceed IEC 62619 safety standards for fully assembled batteries - this includes Cells and BMS.
"Isn't doing it properly going to be expensive?"
No, not really. The compliance side of a lithium upgrade internally is a sealed enclosure with a vent kit, sealed pass-throughs or cable glands and appropriately sized primary branch circuit protection accessible from outside the sealed box. Those add a few hundred dollars to the job at most, or you avoid the box entirely by choosing a battery that mounts under the chassis or has a pre-fitted vent pipe. The bulk of the cost is in the batteries themselves, which you are buying anyway. The install side is a half-day at most for the DIY capable.
Three Ways to Install Your New Lithium Batteries
Because the standard is really about one thing - keeping the battery isolated from the living space - there are three main ways to install your upgrade. Pick whichever suits your van and your build.
Option 1: Mount Your New Batteries Outside the Living Space
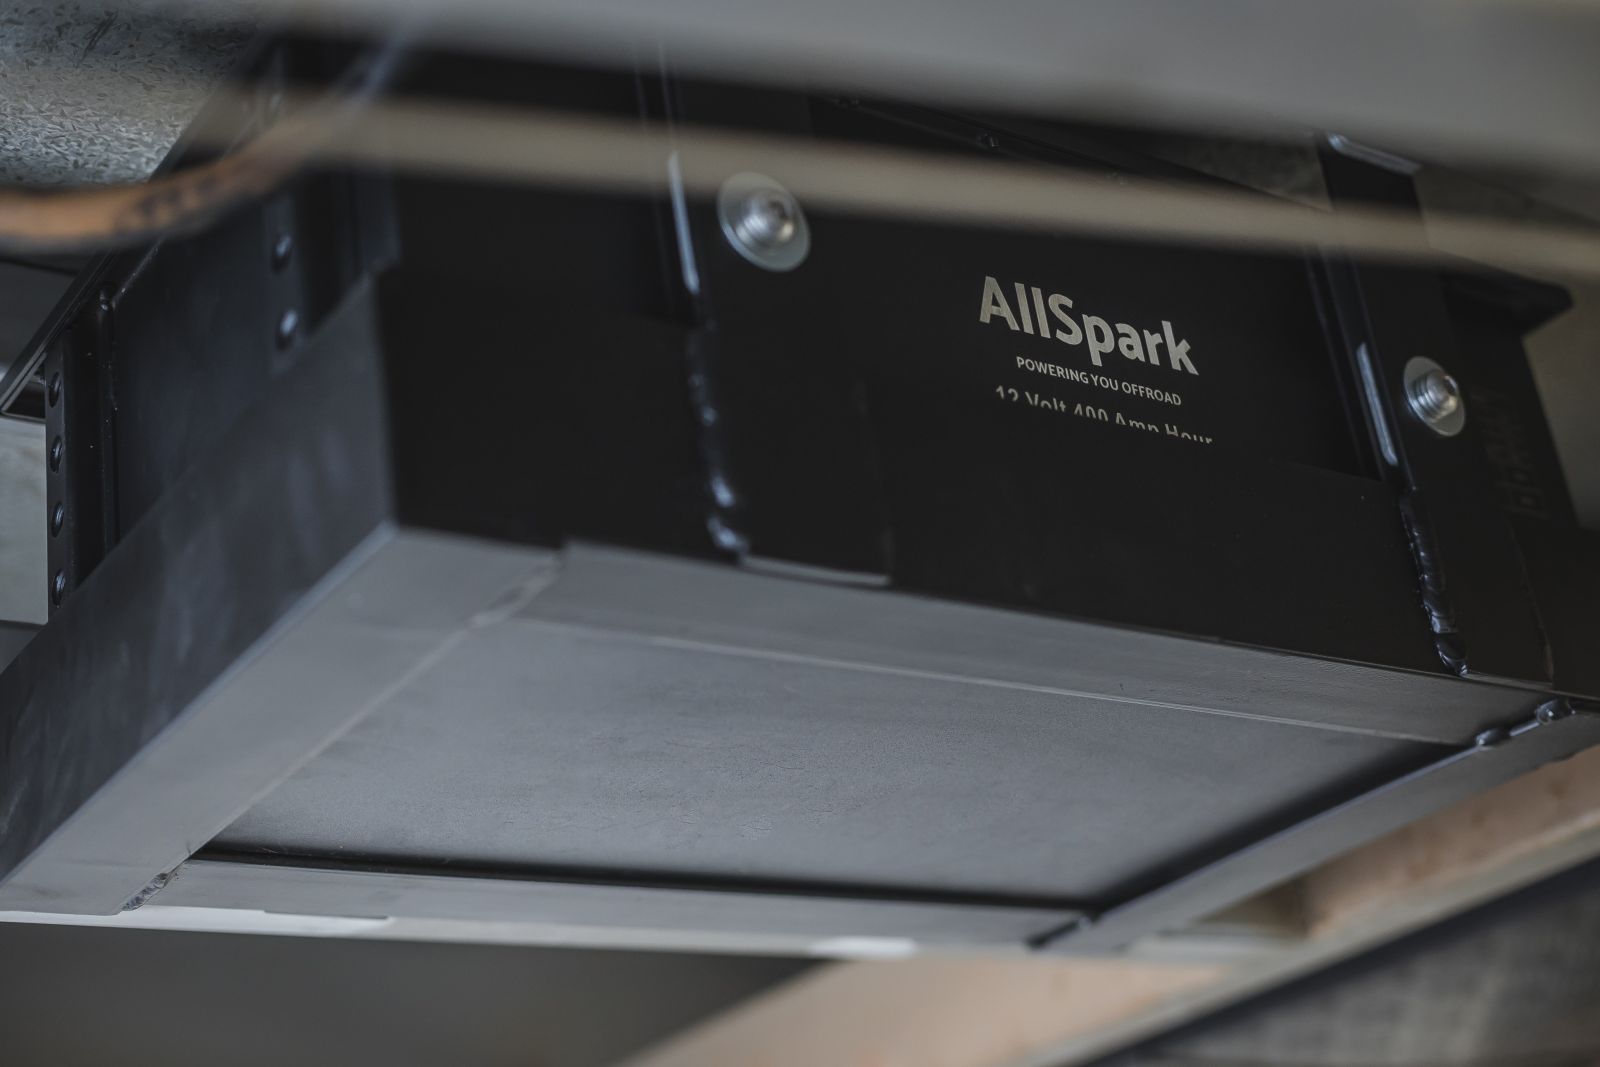
The easiest upgrade is to put the new batteries where the location rule is satisfied automatically: outside the habitable area. A chassis-mount battery is built for exactly this. Our AllSpark Chassis Mount Lithium Batteries are IP67 rated, vibration resistant and designed to bolt under the chassis rail above the lowest point of the frame, so ground clearance is preserved on corrugated tracks and creek crossings.
Because the battery lives outside the body of the van, there is no internal box to build and no internal venting to plan. The location rule is met the moment the battery is mounted. The range runs up to a serious 12v 400Ah, so an upgrade can move your whole bank outside and free up interior storage at the same time. This is the cleanest option for owners stepping up to a bigger system, or anyone short on room inside. If you need more capacity, simply add more batteries in parallel or upgrade to a 24v battery system instead.
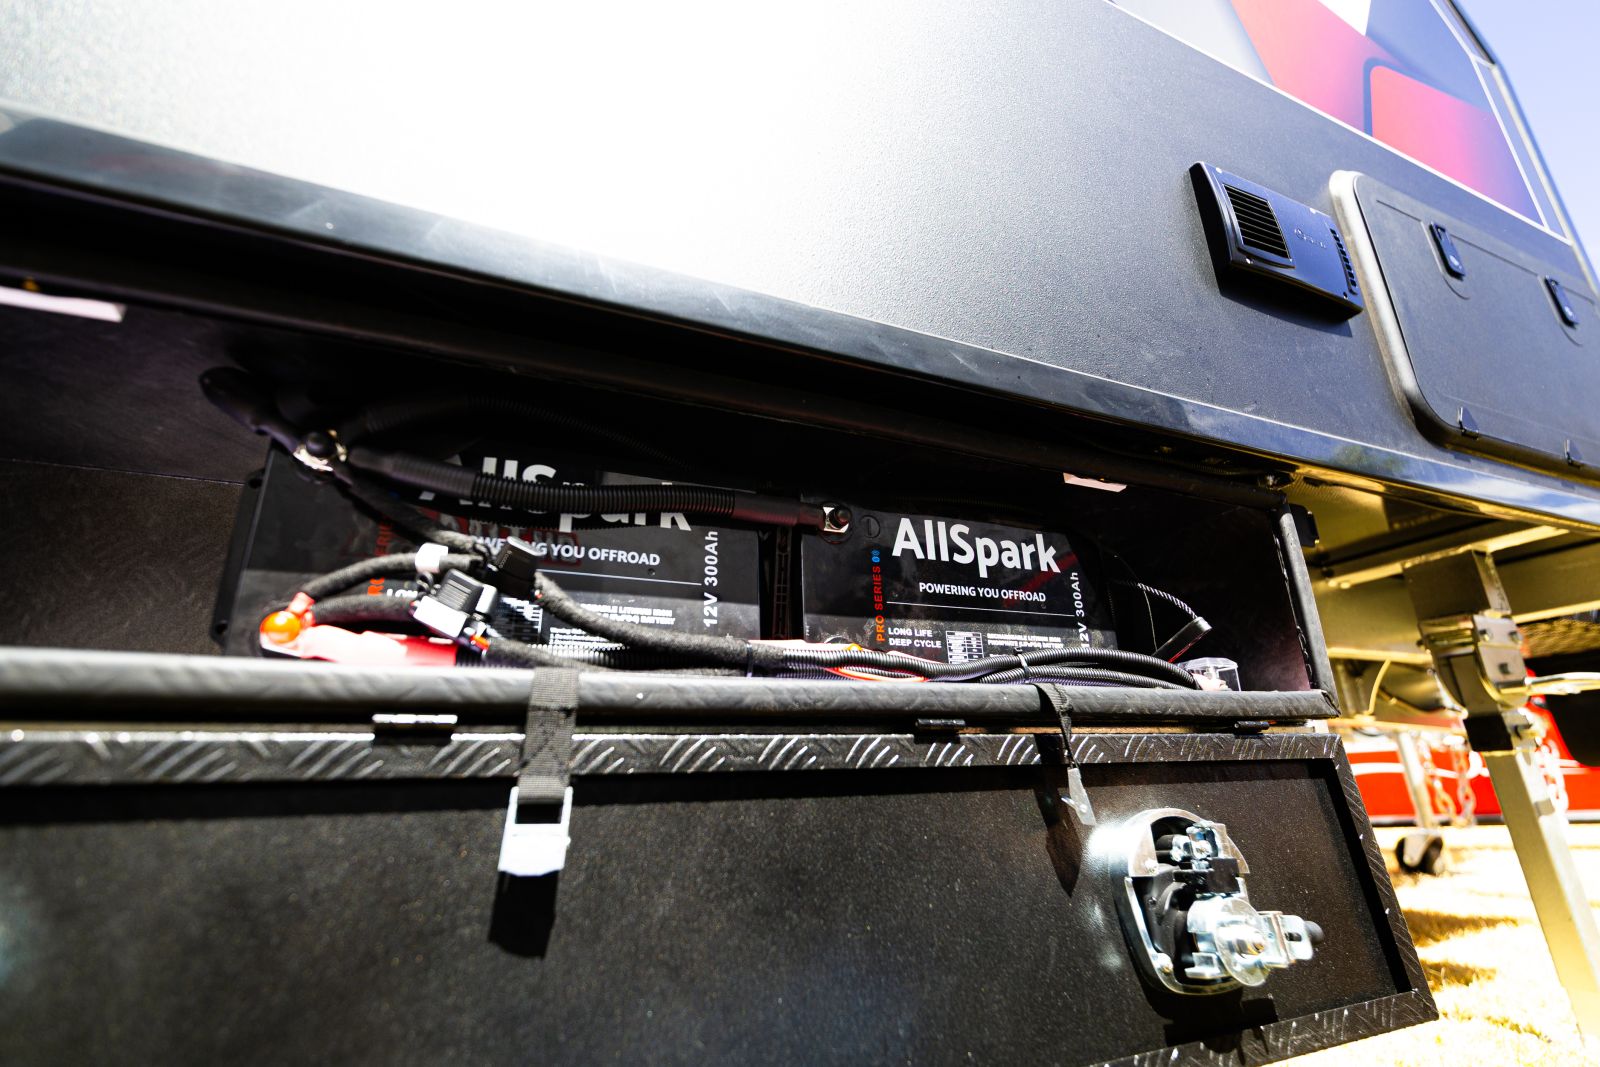
Alternatively, an external caravan battery box can be mounted to the chassis, allowing multiple lithium batteries to be housed inside a single enclosure. These caravan battery boxes are typically dust-resistant rather than fully water-tight, so the batteries inside need to carry their own ingress protection. For sheltered external lockers, our IP65 AllSpark Lithium Batteries are suitable. For under-chassis boxes that may see full submersion through river crossings, step up to our IP67-rated chassis-mount batteries instead.
Option 2: Keep the Batteries Inside, in a Sealed and Vented Box
If you want your new batteries to stay inside - which is common when you are upgrading in the same spot as an existing system - the standard is met by housing them in a sealed compartment vented to the outside.
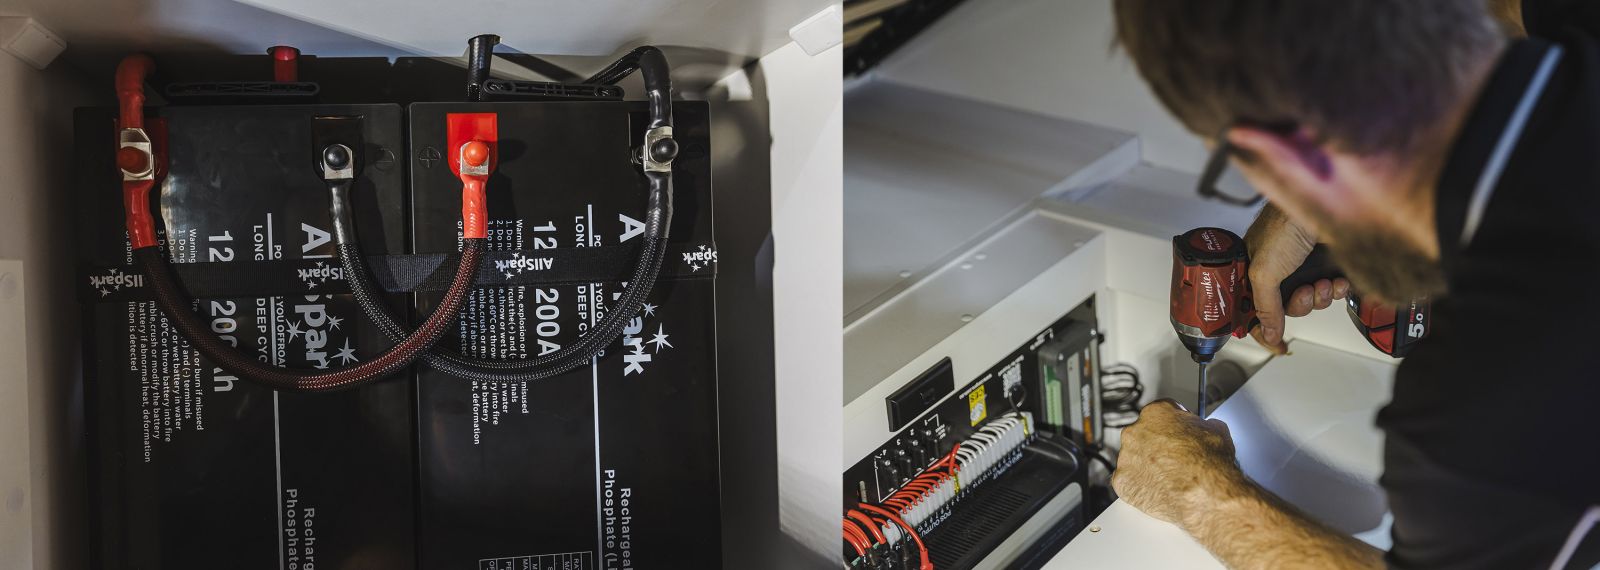
This can be as simple as a timber box, screw-fixed and sealed with Sikaflex - a task well within reach of a confident DIY'er. You then add a vent pipe with a sealed fitting where it exits the box, and a separate cable gland for the battery cables. The vent pipe should be a continuous run to the outside, with no traps, and terminate well clear of any window, hatch or vent that opens back into the habitable space.
Option 3: Fit a Battery with a Built-In Vent Pipe
The simplest internal option of all is to choose a battery designed with a built-in vent port. Instead of building a sealed box around the battery, you connect a vent pipe directly to the battery and route that pipe to the exterior of the van. For a lot of owners upgrading in the same spot the old batteries lived, this is the cleanest and quickest path of all.
Our new AllSpark 300Ah UltraSlim Lithium Battery ships with a pre-fitted vent port. Alternatively, our Chassis Mount batteries can be installed internally and vented to the outside through their own sealed housing.
How to Build a Compliant Battery Box
If you go with Option 2, building the box is not difficult. The principle is simple: a sealed enclosure that separates the battery from the living space, with a vent path to the outside. Here is what a compliant box needs.
- A sturdy box. Plywood or solid timber works perfectly. Size it to leave a small, even clearance around the battery so it is easy to fit and remove later.
- Screw-fixed and sealed. Assemble the box with screws rather than relying on glue alone, then run a bead of Sikaflex or a quality sealant along every internal join. The aim is a box that is genuinely sealed against the living space.
- A sealed, removable lid. The standard requires easy service access, so the lid should be removable, but it must seal when closed. A bead of Sikaflex around the lip, or a simple gasket, does the job.
- Cable glands for the cables. Where the battery cables pass through the wall of the box, fit cable glands sized to the cable in use, so each gland seals properly around the cable.
- A sealed bulkhead fitting for the vent. The vent pipe needs its own pass-through fitting, not a cable gland. Aim for a continuous internal diameter of around 16–20mm, with a constant fall toward the outside (no low points where condensation can pool), and terminate the pipe well clear of any opening that goes back into the habitable space.
- Secure mounting. Screw-fix the box itself firmly to the vehicle, and secure the battery inside it, so nothing shifts in transit.
That is the whole job from a DC enclosure perspective. No specialist tools, no exotic materials. It is worth knowing that LiFePO4 batteries do not off-gas in normal use the way flooded lead-acid batteries do - the sealing and venting is a fault-condition safeguard for the unlikely event of a cell fault, which is exactly what the standard is built around.
Two important notes before you finish. First, AS/NZS 3001.2:2022 expects the installation to be carried out or supervised by a competent person. The DC enclosure work above is within reach of a capable DIYer, but it is worth having a competent person verify the finished installation, particularly the circuit protection, fusing and cable sizing around the new battery. Second, if your upgrade also includes 230V AC circuits, that wiring must be carried out and certified by a licensed electrician - it is not DIY work, even for a competent person.
Your Lithium Upgrade Checklist
Work through this list before you buy and as you install. If you can tick every box, your lithium upgrade is done right.
- The battery is fully certified to AS IEC 62619.
- The battery has an integrated BMS with over- and under-voltage, over-current and temperature protection.
- You have decided where the new batteries will live: outside the habitable area, or inside a sealed compartment.
- If inside: the compartment is sealed against the living space and vented to the outside via a sealed bulkhead fitting and an appropriately sized vent pipe. If using a battery with vent port capability, include a on way check valve to the exterior to stop ingress of dust/moisture/bugs directly into the battery.
- Cables enter the compartment through cable glands sized to the cable.
- The batteries are mounted securely and cannot move during transit.
- There is easy service access through a sealed, removable panel or lid. It should include labels/signage of what is inside.
- Your DCDC charger, MPPT solar controller and mains charger all have a LiFePO4 profile selected, or have been replaced with units that do (see here for information on why it is not recommended to charge a lithium battery woith a lead acid charger).
- A circuit breaker outside the battery box immediately adjacent to and as close to the battery as possible and sized to the install.
- The installation has been carried out, or verified, by a competent person.
- Any 230V AC work has been completed and certified by a licensed electrician.
Frequently Asked Questions
Can I just do a drop-in lithium replacement for my AGM batteries?
Physically, lithium will drop into the same terminals as your old AGM. From a compliance perspective, however, the swap is treated as new work — so the install location, venting and your charging system all need to be re-checked under AS/NZS 3001.2:2022, rather than assumed compliant because the previous setup was. The job itself is straightforward, but it is more than dropping a battery into the old spot and walking away.
Does AS/NZS 3001.2:2022 apply when I upgrade my caravan batteries?
Yes, when your van is grid-connectable (it has a 230V inlet socket). The standard applies when you build, install, modify or upgrade an electrical installation, and switching to lithium or adding capacity to an existing lithium bank both count as upgrade work. For DC-only vans with no 230V inlet, the standard sits outside scope, but the same install principles are still good practice.
Can you install lithium batteries inside a caravan?
Yes. Lithium batteries can be installed inside a caravan, including under a bed, seat or cupboard. The battery must be housed in a sealed compartment that is vented to the outside or use a battery that is already built to meet this function, so any fault-condition gases cannot enter the habitable living area.
Where should I install lithium batteries when upgrading my caravan?
Lithium batteries should be installed outside the habitable area. That means under the chassis rail, in an external locker, or inside the van within a sealed compartment that is vented to the outside. The key requirement is that any fault-condition battery gases cannot reach the living space.
Will my insurance cover a lithium battery upgrade?
Insurers increasingly expect a compliant installation and proof the battery is certified to AS IEC 62619. Upgrading with a properly housed, sealed and vented installation, and keeping the battery certificate on file, puts you in the strongest position if you ever need to make a claim.
Is it expensive to upgrade a caravan to lithium properly?
The bulk of the cost is in the batteries themselves, which you are buying anyway. The compliance side adds a vent kit, sealed pass-throughs, an isolator, an appropriately sized main fuse, and either a simple sealed box or a chassis-mount battery that avoids the box entirely. Those extras typically add a few hundred dollars to the job — a small fraction of the upgrade itself, and a half-day of work for the DIY capable.
Does a lithium battery box need ventilation?
Yes. When a lithium battery is installed inside a caravan, the standard requires its compartment to be vented to the outside. This ensures any fault-condition gases are directed away from the living space rather than into the cabin.
Can I install a lithium battery inside without building a box?
Yes. As well as building a sealed, vented box, you can fit a battery designed with a built-in vent port. You connect a vent pipe from the battery directly to the exterior of the van, so any gases are carried straight outside. This satisfies the location rule without a separate enclosure around the battery.
What makes an AllSpark lithium battery a safe upgrade?
AllSpark lithium batteries are tested and certified to AS IEC 62619 and include a battery management system with over- and under-voltage, over-current and temperature protection. A test certificate is available, which is the proof insurers and inspectors look for.
Upgrade Once, Upgrade Right
Upgrading to lithium is one of the best things you can do for your van: more usable power, far less weight, and years of reliable off-grid freedom. The rules around it sound daunting, but doing the upgrade properly is simple. Choose a certified battery with a proper BMS, then mount it outside the living space, seal and vent it inside a basic box, or fit a battery with a built-in vent pipe. Do that, have a competent person verify the finished job, and your new system is safe, insurable and sorted for the long haul.